

Data type wizard
In order to define complex data types, the ClassEditor provides a Data Type Wizard. The wizard supports you defining necessary attributes for complex data type definitions and properties. In order to start the data type wizard, one might select Data Type Wizard from the context menu after selecting an entry in the Structure region of the class tree or select the Data Type Wizard item from the insert menu in the toolbar.
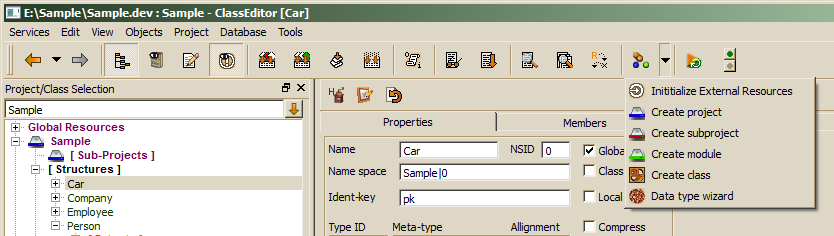
Then, the Data Type Wizard pops up and leads you through the data type definition steps:
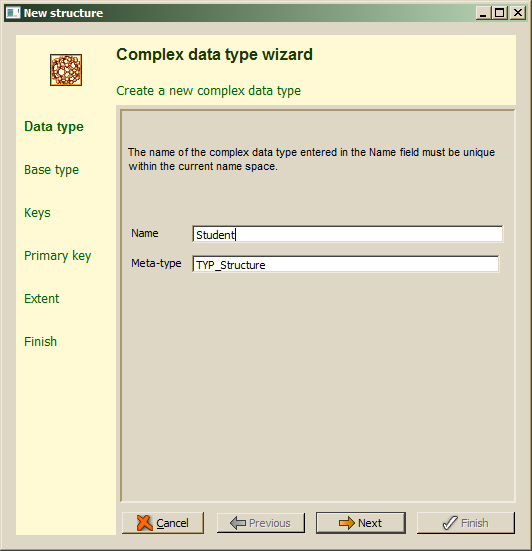
The data type name is a technical name which must not contain spaces or special characters. Only alphanumeric characters and underscore are allowed. The data type name must be unique within the namespace among all other data types and enumerations. After entering the data type name, the Next button should be pressed in order to continue:
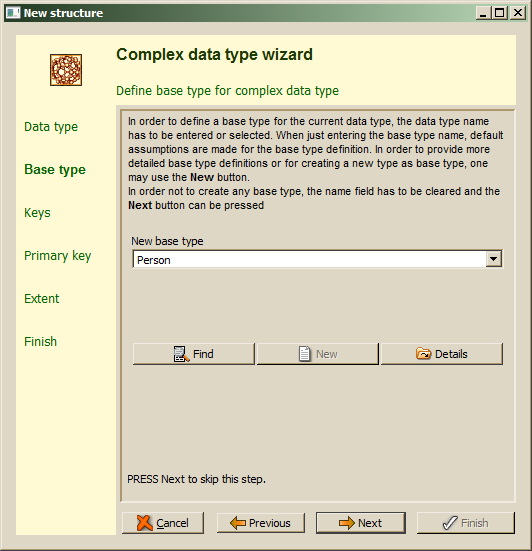
The next step is defining a base type, when the data type inherits from another complex data type. In contrast to most programming languages, the base type in ODABA is a member, which might get a member name different from the structure name. It is, however, suggested to use the structure name as member name as long as the data type does not inherit twice from the same data type. The wizard supports one complex data type as base type, which is sufficient in most cases. When no base type is requires, just leave the field empty and continue with Next. Otherwise, one may select a data type from the drop list or use enhanced find by pressing the Find button. This allows selecting a data type defined in other projects or a system data type. When the type for the data type has not yet been defined, one may enter the new data type name in the field and press the New button. In this case, a sub wizard for defining new base type pops up, which will be described in chapter Base Type Wizard.
The data type wizard also not provides more specific base type specifications as base collection or inverse reference, which might be added later in the data type editor. After clicking next, the key definition page will be activated.
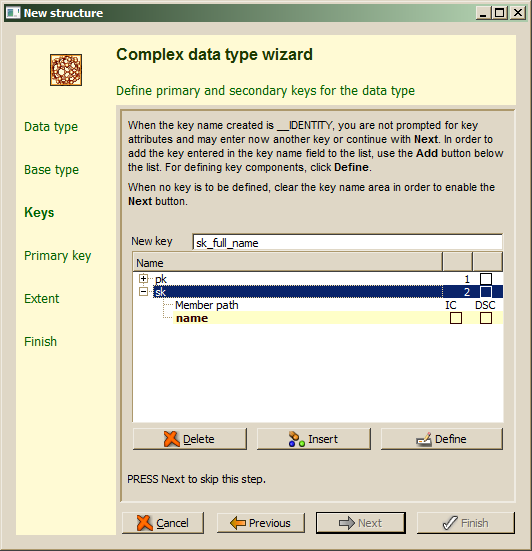
When a base type has been selected, key definitions defined for the base type are copied to the new type definition. Details for key definitions (key components) might be displayed by expanding the key entry in the list. Keys not required for the new data type might be removed from the list using the Delete button after selecting the key to be deleted. New key definitions might be added by entering a key name in the New key field and inserting the key pressing Insert. Keys might, but need not to be defined here in detail. In order to define a key inserted to the list or change the definition for one of the keys copied to the structure, the Define button might be used. In this case, the Key Definition Dialog pops up, which allows defining key components (see Key Definition Dialog).
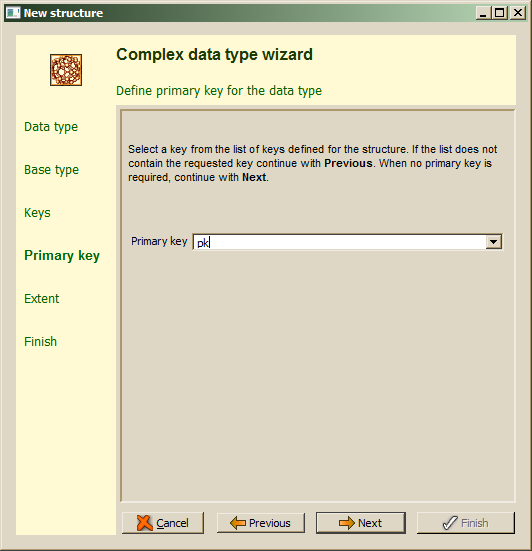
After defining keys, one of the keys should be selected as primary key. Usually, the primary key provides a unique key value for all instances of the given type. The primary key must be one of the keys defined before, which are displayed in the drop list. When the type is used in local context, only, the primary key needs to be unique within the local context. The next step defines an extent for the data type.
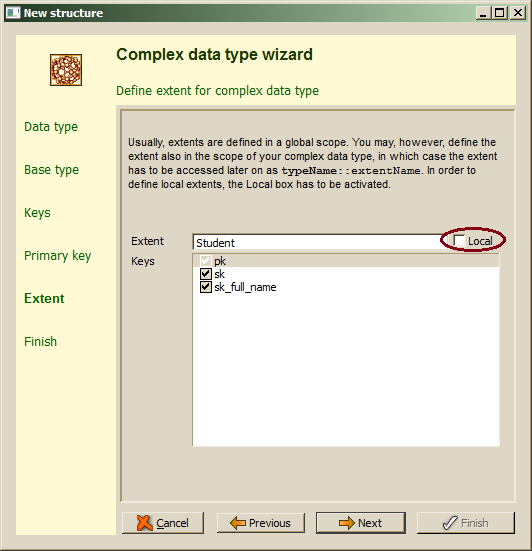
As long as extent names are unique within the project scope, any name might be used for the extent. By default the data type name is suggested as extent name, which is useful since many standard assumptions for initializing member attributes later on are based on this assumption. One may, however, change the name. This is typically the case, when defining local extents by activating the Local switch. Local extents are defined in the scope of the data type rather than as global extents in the project extent collection shown in the class tree. In contrast to refer to a local extent, the name has to be preceded by the type name (e,g, Student::my_extent) when referring to it.
The wizard's suggestion is, that all defined keys are used as access keys (sort orders) for the extent collection. This is not always useful and required additional maintenance effort when running the database. Hence, keys not really needed as access keys for the extent might be deactivated.
After clicking Next, the data type wizard might be finished or one may continue with defining data type members.
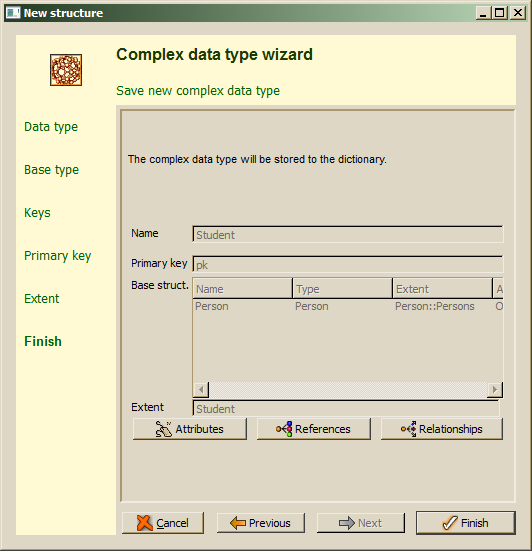
When defining a new type in an existing project, it might be a good way to define data type attributes, references and relationships by choosing the corresponding definition button, in which case the attribute, reference or relationship wizard pops up. Since member definition usually refer to other types, these types should already be available when defining the member. Hence, when defining the data model for a new project, it might be better to define data types before starting to define members.
When closing the wizard now, one may start different member wizards also from the different member lists as described in the following chapters. In order to update member definitions or to call member wizards, the data type to be updated has to be selected in the class tree and the Members tab should be activated on the right side work property sheet. .